WarrenTalk

后端程序员学CSS系列1:布局

作为一个略懂前端的后端程序员,写页面基本上就是先抄再调,这个调的过程苦不堪言,归根到底是基础不扎实,所以恶补前端只是势在必行了。目前,我也已经开始相应的学习,并且计划把自己的学习过程用blog记录下来,以便自己日后温习,所以这篇会是后端程序员学前端系列的第一篇,后续会有更多前端学习笔记分享出来。

概念

  • 浮动
  • 清除
  • 定位

几个重要的属性

  • float属性:设置float属性后,元素会被周围内容环绕,可用于实现文字环绕图片,以及页面的整体布局

    * 取值: left | right | none | inherit
    * float:left表示元素浮动到左侧
    * float:right表示元素浮动到右侧
    
  • clear属性:清除元素两侧的浮动元素,避免元素被浮动元素环绕

    * 取值:left | right | both | none | inherit
       * clear:both表示元素的同一行中不会出现浮动元素
       * clear:left表示元素的左侧不会出现浮动元素
       * clear:right表示元素的右侧侧不会出现浮动元素
    * 仅用于块级元素
    
  • position属性: 表示元素的定位机制

    * 取值:static | relative | absolute | fixed | inherit
       * relative: 相对于元素未定位前的位置偏移
       * absolute: 相对于最近的非static的祖先元素偏移,较为简单,是常用的一种定位机制
       * fixed: 相对是视窗偏移,意味着即便页面滚动都一直停留在原来的位置,可以用来实现header或者footer不随滚动条移动的效果
    
  • 四个偏移属性:top, right, bottom, left

    * 取值:<length> | <percentage> | auto | inherit
    * 定义了各个方向上的偏移量,配合position属性使用
    

Practice

这些概念理解起来比较复杂,推荐一个不错的网站——学习CSS布局, 这个网页用例子的形式将这些概念解释得简单易懂。

1. 利用position布局

HTML

1
2
3
4
5
6
7
8
9
10
11
12
13
14
15
16
17
18
19
20
21
22
23
24
25
26
27
28
<html>
<head>
<link rel="stylesheet" href="layout-with-position.css">
</head>
<body>
<div class="header border"></div>
<div class="container border">
<div class="menu border">
<ul>
<li>Item 1</li>
<li>Item 2</li>
<li>Item 3</li>
<li>Item 4</li>
<li>Item 5</li>
<li>Item 6</li>
<li>Item 7</li>
</ul>
</div>
<div class="content border">
<span>Content 1</span>
</div>
<div class="content border">
<span>Content 2</span>
</div>
</div>
<div class="footer border"></div>
</body>
</html>

CSS

1
2
3
4
5
6
7
8
9
10
11
12
13
14
15
16
17
18
19
20
21
22
23
24
25
26
27
28
29
30
31
32
33
.border {
border: solid red 3px;
}

.header {
width: 100%;
height: 40px;
background-color: black;
}

.container {
position: relative;
width: 100%;
}

.menu {
position: absolute;
left: 0px;
width: 200px;
background-color: white;
}

.content {
margin-left: 200px;
height: 250px;
background-color: yellow;
}

.footer {
width: 100%;
height: 40px;
background-color: green;
}

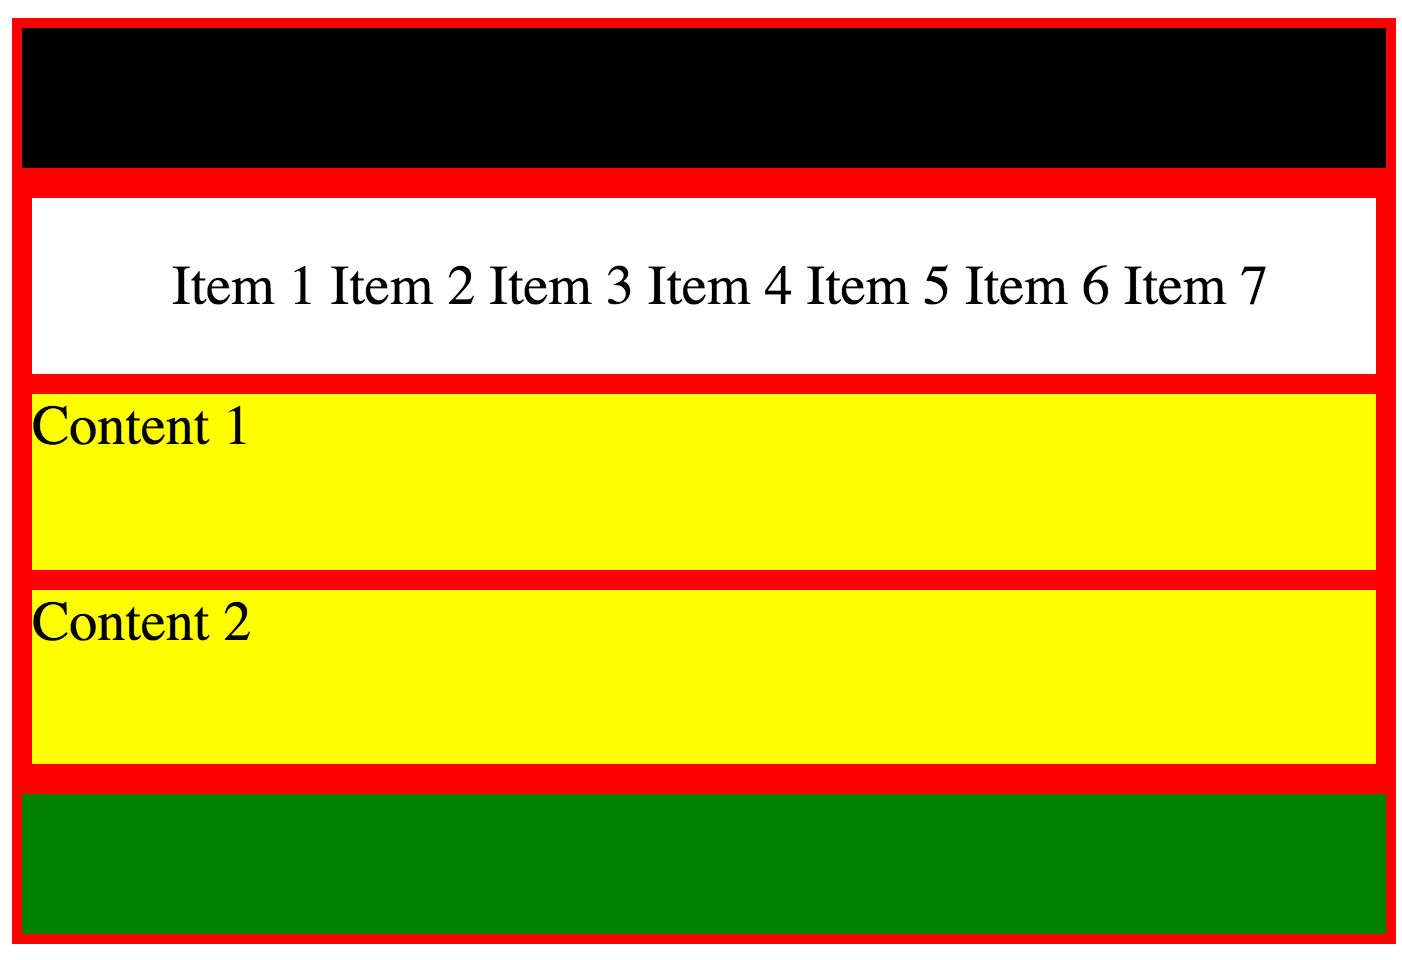
效果图

利用position实现布局

2. 利用float布局

  • clearfix hack:用于避免包含在容器中的浮动元素超出容器

    1
    2
    3
    4
    .clearfix {
    overflow: auto;
    zoom: 1; // for IE 6
    }
  • 如果使用百分比做宽度,针对移动屏幕,需要使用media query实现responsive design

HTML

1
2
3
4
5
6
7
8
9
10
11
12
13
14
15
16
17
18
19
20
21
22
23
24
25
26
27
28
<html>
<head>
<link rel="stylesheet" href="layout-with-float.css">
</head>
<body>
<div class="header border"></div>
<div class="container border clearfix">
<div class="menu border">
<ul>
<li>Item 1</li>
<li>Item 2</li>
<li>Item 3</li>
<li>Item 4</li>
<li>Item 5</li>
<li>Item 6</li>
<li>Item 7</li>
</ul>
</div>
<div class="content border">
<span>Content 1</span>
</div>
<div class="content border">
<span>Content 2</span>
</div>
</div>
<div class="footer border"></div>
</body>
</html>

CSS

1
2
3
4
5
6
7
8
9
10
11
12
13
14
15
16
17
18
19
20
21
22
23
24
25
26
27
28
29
30
31
32
33
34
35
36
37
38
39
40
41
42
43
44
45
46
47
48
49
.border {
border: solid red 3px;
}

.header {
width: 100%;
height: 40px;
background-color: black;
}

.container {
width: 100%;
}

@media screen and (min-width:600px) {

.menu {
float: left;
width: 20%;
background-color: white;
}

.content {
margin-left: 20%;
height: 50px;
background-color: yellow;
}
}

@media screen and (max-width:599px) {
.menu ul li {
display: inline;
}
.content {
height: 50px;
background-color: yellow;
}
}

.footer {
width: 100%;
height: 40px;
background-color: green;
}

.clearfix {
overflow: auto;
zoom: 1;
}

效果图

利用float实现布局

小屏幕下的效果图

利用float实现布局-在小屏幕上的表现

3. 利用inline-block布局

其缺点是不支持IE6、IE7,这里就不列code了,大家可以在学习CSS布局那个网站看到例子。

4. 利用flexbox布局

在CSS3中引入,看上去比较高大上,不能被大多旧的浏览器支持,据说只支持Chrome,有兴趣的不妨自己一试。

Reference

  1. CSS权威指南
  2. 学习CSS布局,http://zh.learnlayout.com

卧舟杂谈
订阅我的微信公众号,您将即时收到新博客提醒!